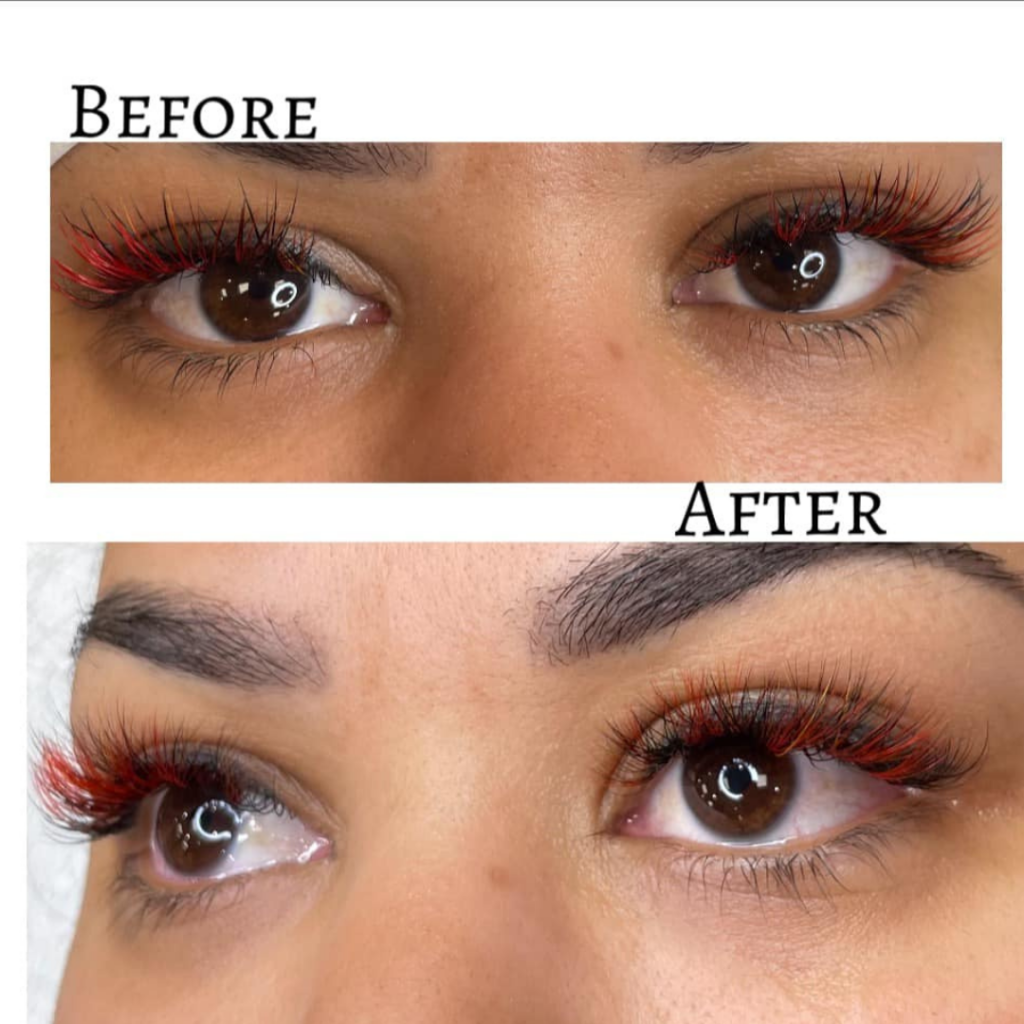
Pic 2 1

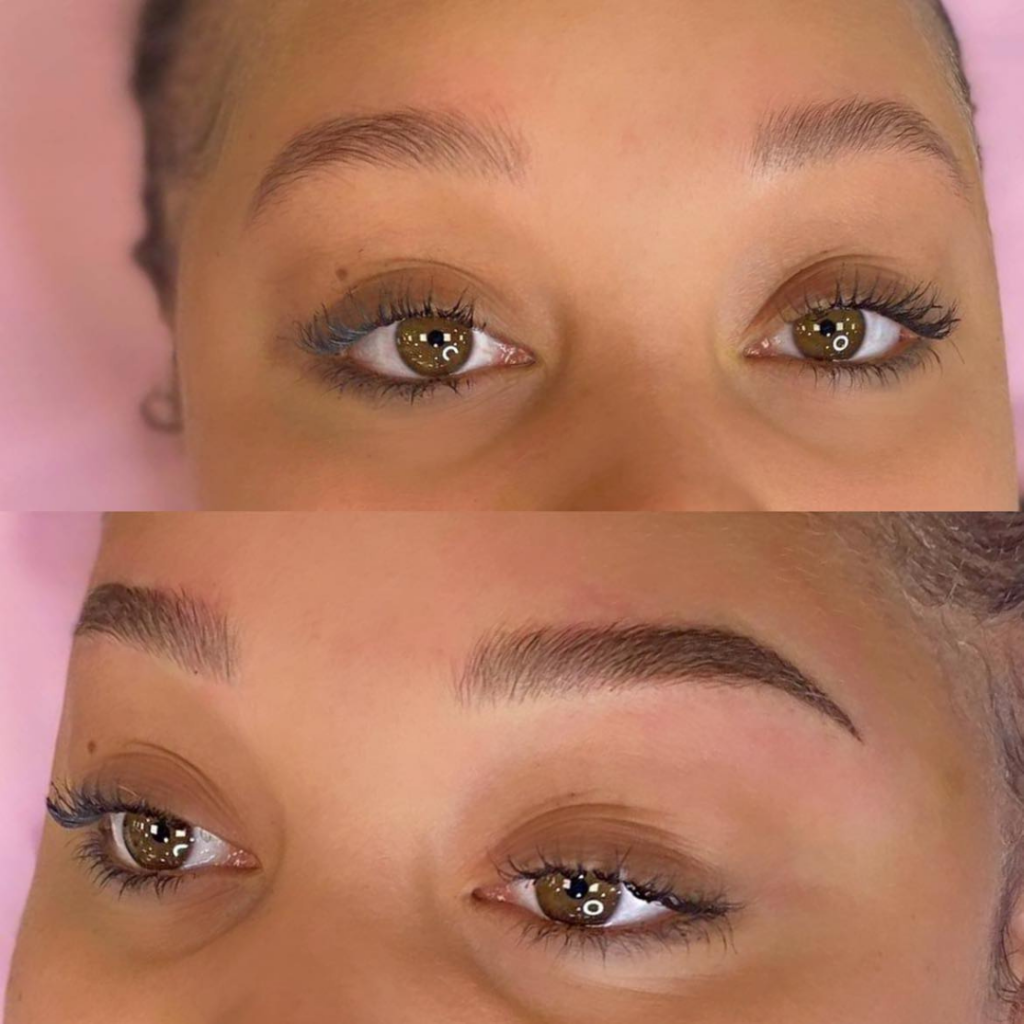
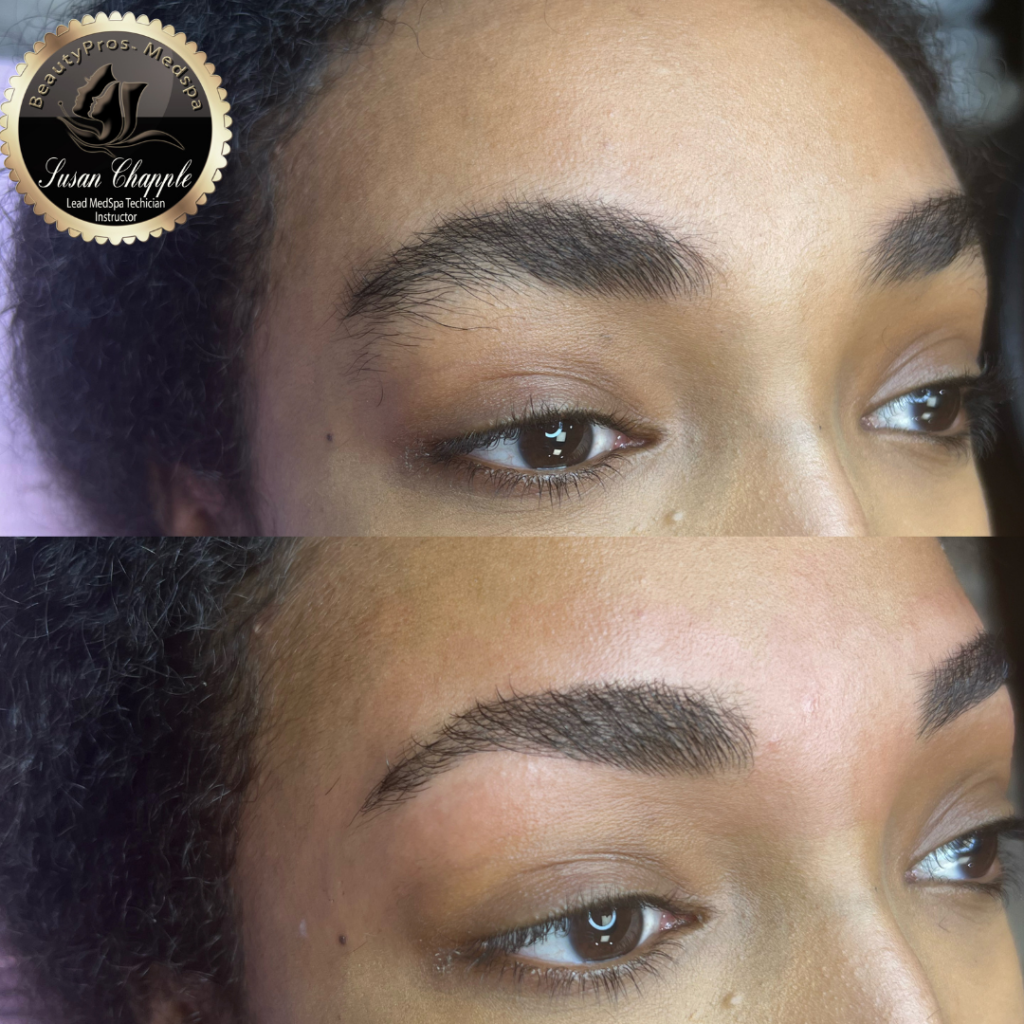
3D Microblading Hair Strokes

MICROBLADING is a manual, semi-permanent technique that creates a very natural no makeup style of eyebrows. Using a specialized hand tool, your licensed artist will place pigment matched to your unique coloring into the upper layers of the skin. These hair strokes of color can look very natural and give the illusion of replacing hairs that are lacking in your natural brow. Manual shading can also be added to create more dimension.


$225

Add Manual Shading: $50+

Book now got questions? contact us now!
Ombre brow - permanent makeup service

The “WOW” Ombre Brow

“WOW” COMBO BROW combines the best aspects of Microblading & Powder Brows into a unique pattern designed just for you.  Microblading is manually applied where needed to create a natural hair appearance while the machine powder application will create the ombre effect and give definition & dimension.

$325

Book now got questions? contact us now!
Pic 4

Powder Shading Ombre

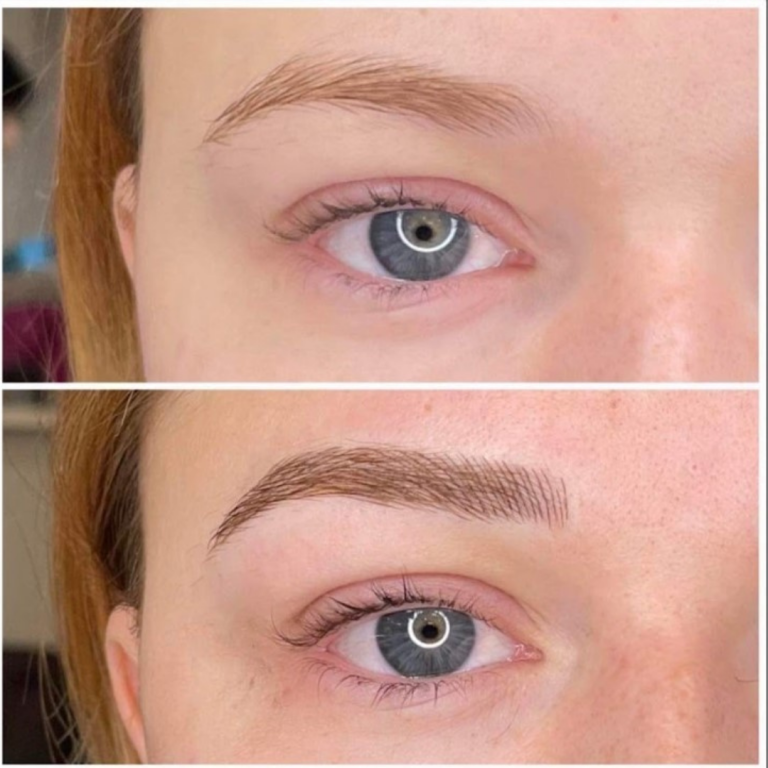
POWDER SHADING OMBRE BROWS are a semi-permanent brow tattoo technique that creates a soft, powdered look that subtly fills in your brow. It can be customized and is often done in the Ombre style of light to dark. As well, it can be designed very sheer or bold depending on your desired result.

$225

Book now got questions? contact us now!
Pic 5

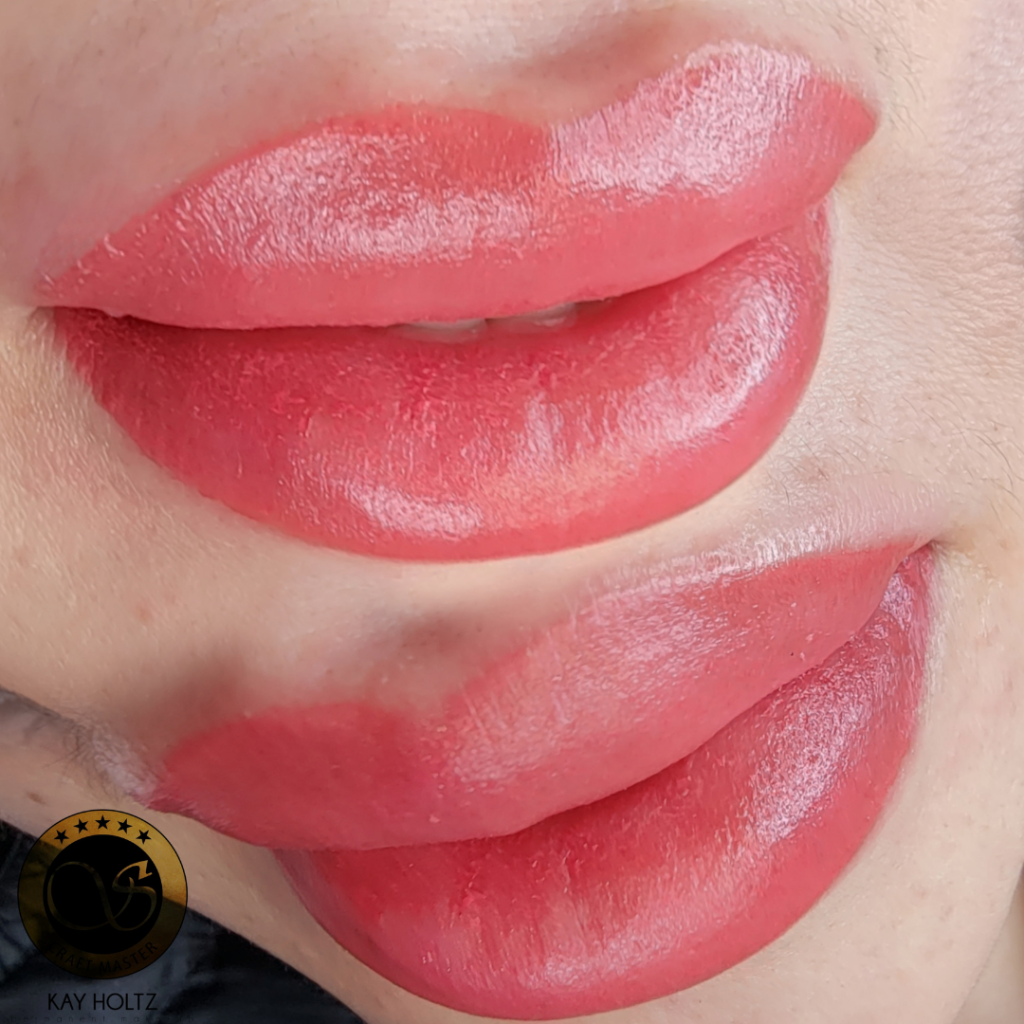
Lip Blushing

Lip Blushing is a semi-permanent cosmetic treatment that gives a light wash of color or blush of color to the lips. The results are very different from the hard solid look of lip tattooing done in the past. Once healed you can expect a look similar to that of a lip stain. There are options to have a more lipstick look to the lip blush as well as options for natural lip color correction.

Not only does this tint lips with color, but makes them appear fuller and more defined.

$325

Book now got questions? contact us now!
Pic 6 1

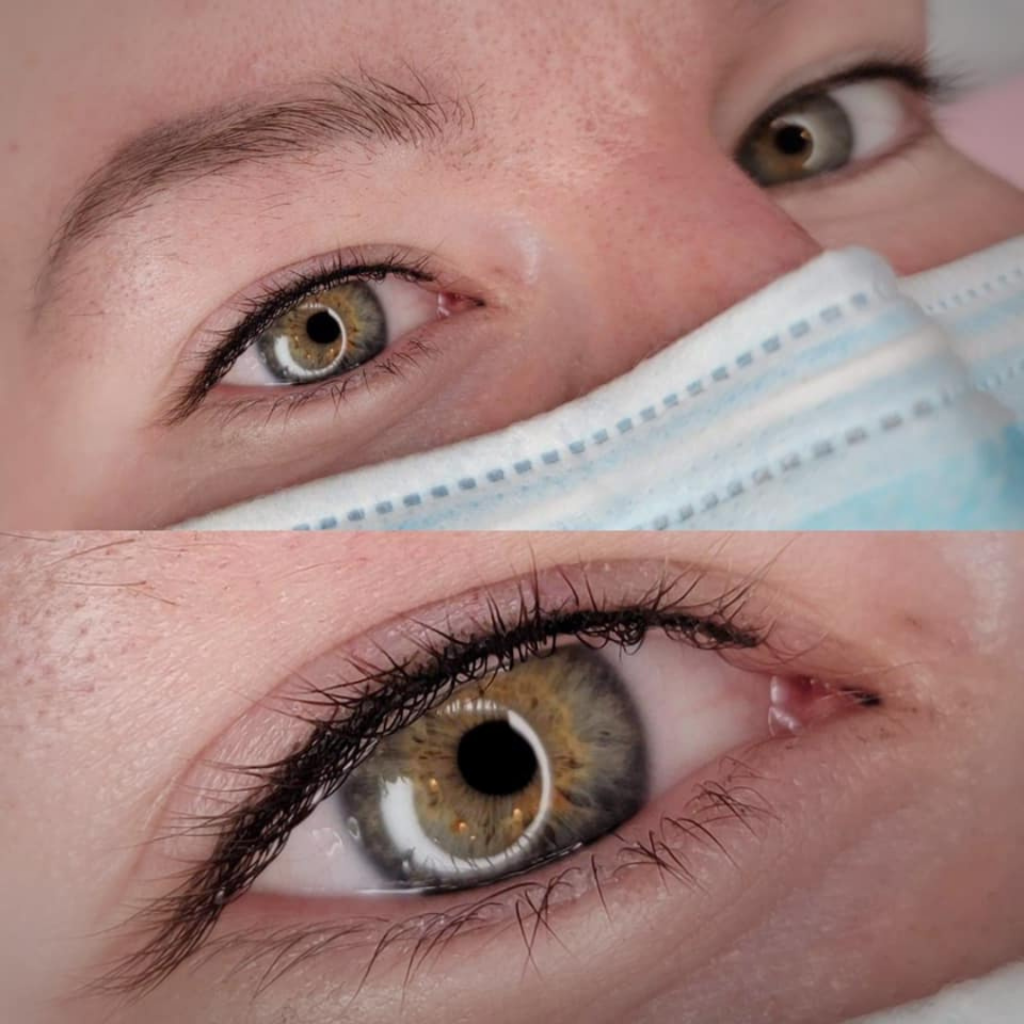
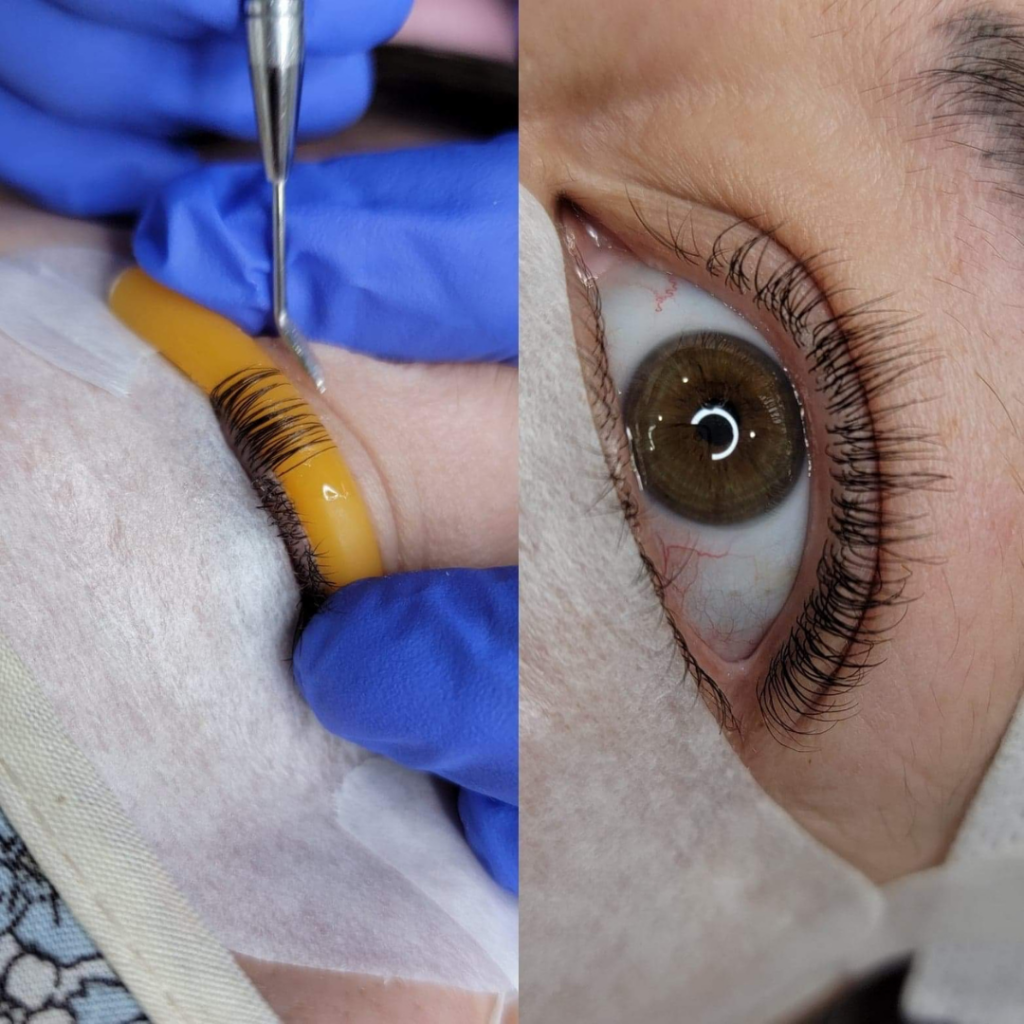
Eyeliner/Both Eyeliners

Say goodbye to wobbly lines and makeup that begins to slide by noon. With permanent eyeliner you can look your best all day every day!

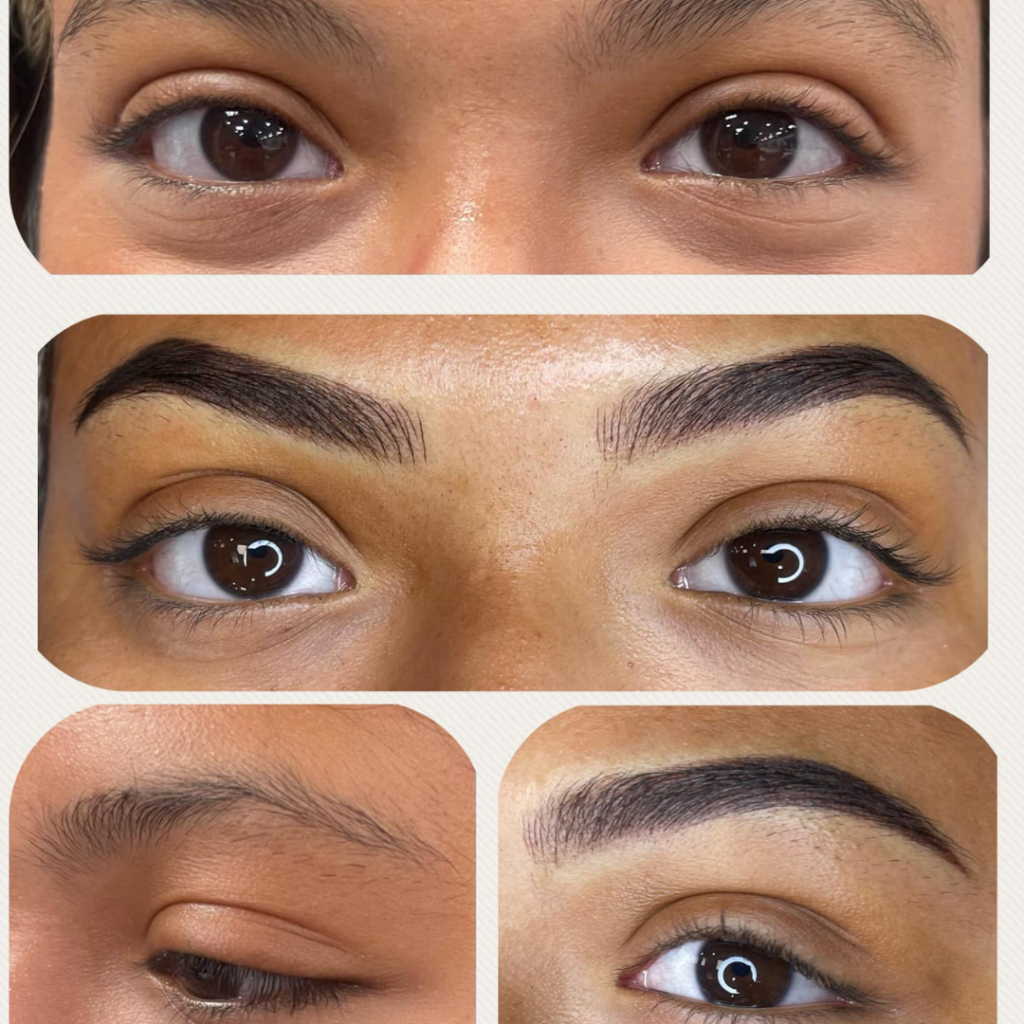
Every face is unique and your eyeliner should reflect that. We want you to get the exact look you desire so offer a variety of styles and colors that are tailored for you. You can tattoo upper & lower lash line or just upper/lower. The choice is yours!

Eyelash Enhancements are perfect for those who feel they don’t want an obvious eyeliner tattoo but would like more definition of the eyes without the use of makeup. Pigment is carefully implanted into the areas in between the lashes top and/or bottom. This gives a hint of eyeliner without the obvious line.

Classic Eyeliner is ideal for those who wear pencil or liquid liner daily and who like to accent the shape of their eye. The classic look ranges from a liner tapered on both ends to a liner with a small wedge or wing at the outer corner. All classic eyeliners include the lash enhancement. The style is completely customizable.

Top Eyeliner: $225

Bottom Eyeliner: $150 

Top & Bottom Eyeliner: $325

Book now got questions? contact us now!

Our Work

Cos Pic 10
Cos Pic 9
Cos Pic 4
Cos Pic 5
Cos Pic 6
Cos Pic 7
Cos Pic 8

Treatment

Frequently Asked Questions

HOW DOES IT WORK?
Before the procedure, your existing brows & skin will be analyzed. Then, using your individual bone structure and the Golden Ratio technique, a new shape is carefully drawn out. Your brow will be tailored for you…no cookie cutter / stencil designs.
Microblading is done in 2 sessions spaced 4-6 weeks apart. In the first session the shape will be set, color will be deposited and the foundation of your new brows will be built. In the followup “Perfection Session” we will spot correct, adjust size if needed and finalize the perfect color. Occasionally, depending on your individual healing process, a third session may be required. Your first session will be 2.5-3.5 hours depending on your skin & your artist. The final result should not be judged until 4-6 weeks after the touch up procedure.

WHO IS A GOOD CANDIDATE FOR MICROBLADING?
– Microblading is an ideal choice for you if you desire the no makeup look. If you have some natural brows that are uneven & lacking in areas (front and tails). And if you just desire the appearance of a fuller brow.
– Microblading can also be a good choice for those with no natural hair due to alopecia or post chemotherapy.
– Microblading is ideal for both men & women over 18.

WHAT ARE THE CONTRAINDICATIONS FOR MICROBLADING?
– Microblading is not suited to those with oily skin, a history of keloid scarring or eczema/ psoriasis in the brow area.
– Those taking Rx blood thinners (must have a physician’s note.)
– Pregnant or Nursing
– Diabetic (if not using insulin, you may get a physician’s note of approval)
– Chemotherapy & Radiation (must be 12 months post treatment)
– Viral Infections or Diseases such as Hepatitis B
– Epilepsy (consult with your physician)
– Pacemaker or major heart problems
– If you normally take antibiotics prior to dentist visits you must be premedicated prior to your microblading session and have a physician’s note
– Organ transplant (consult your physician)
– Actively sick (flu/cold symptoms)
– Recent Botox or Dysport ( must wait minimum of 2 weeks)
– Currently on Accutane or any oral form of retinoid (must wait 6 months for treatment)

HOW SHOULD I PREPARE FOR MY MICROBLADING APPOINTMENT?
– Do not drink coffee or energy drinks on the day of treatment. Do not drink alcohol 24 hours before the day of treatment.
– Do not take Aspirin, Niacin, Vitamin E or Ibuprofen (Advil) 24 hours before treatment.
– Do not take Omega3 (fish oil) 1 week before treatment
– Do not tan or have intentional sun exposure 3 days before treatment
– No chemical peels, microdermabrasion, laser or other treatments 2 weeks before treatment.
– Do not wax, tweeze or tint brows for 7 days prior.
– Shower & fix your hair (due to the fact that you will need to avoid getting the application area wet for several days).
– If you desire/ require a patch test, it must be done 24-48 hours prior to treatment. Please discuss with your artist.
– Prior microblading not done by our artists will need to be evaluated for suitability of new service. A photograph is fine or a consultation is available free of charge.

WHAT IS THE AFTERCARE PROCEDURE LIKE?
After Care is an extremely important part of the microblading process. The ultimate success of your procedure relies on your diligence to after care instruction.
– The tattooed area will be dark for the first several days and then will fade about 50% after the first three days into a natural shade.
–  While healing, the tattoo will look spotty. Do not be alarmed by fading after the first application. The final color cannot be judged until at least 3 weeks after the 2nd appointment. This is the reason follow-ups are required.
–  If there is any swelling immediately after the procedure, an ice pack should be applied for no more than 15 minutes at a time
– DAY 1: 30-60 minutes after treatment it is necessary to clean your brows with a ph neutral wipe or soap which will be provided in your AfterCare Kit. This removes excess pigment and lymph and prevents thick scabbing. Thick scabbing is the enemy of pigment retention so do not neglect this step. Clean gently with the wipe or fingertips. If using soap, rinse & air dry or blow dry on low. Then apply a small amount of ointment/ balm from your AfterCare Kit.
– Day 2-10: AM- Shower, avoid brows. PM- Wash brows, air or blow dry, then apply ointment. If a soap isn’t part of your kit, you can use Dial or Baby Shampoo.
– While healing do not use ANY other products around the treatment area or submerge in water ( i.e. swimming, showers )
– Avoid hot showers, saunas, steam rooms and heavy sweating.
– Do not pick, itch or touch! Light scab must remain for 5+ days to keep pigment. If brows feel uncomfortably dry or itchy apply a small amount of ointment.
– Avoid sleeping with your face pressed against your pillow. Use a fresh pillowcase the first night & change regularly. Silk or satin is ideal.
– Avoid applying makeup to the brow area for 10 days.

HOW LONG WILL MICROBLADING LAST FOR?
– How long your microbladed brows will have a perfect appearance is different for everyone. The average is 12-24 months after which they will begin to fade as the body begins to break down the pigment. At this point, you should schedule a Color Refresh appointment.
– People with dry skin are not only perfect candidates for microblading, they can expect to have longer color retention. People with more oil in their skin may need to have a Color Refresh sooner and more often; Sometimes as early as 6-8 months. This is why microblading is not recommended for very oily skin types.

WHO IS IT FOR?
– Those who normally wear brow makeup on a daily basis
– Oily skin condition who are not good candidates for 100% microblading but would still like to see some hairstrokes
– Anyone who likes a very groomed, natural look to their brow
– Anyone with missing brow hair or with sparse hair growth

HOW DOES THE PROCEDURE WORK?
– Before the procedure, your existing brows & skin will be analyzed. Then, using your individual bone structure and the Golden Ratio technique, a new shape is carefully drawn out. Your brow will be tailored for you…no cookie cutter / stencil designs.
– WOW COMBO BROWS are done in 2 sessions spaced 4-6 weeks apart. In the first session the shape will be set, color will be deposited and the foundation of your new brows will be built. In the follow up “Perfection Session” we will spot correct, adjust size if needed and finalize the perfect color. Occasionally, depending on your individual healing process, a third session may be required. Your first session will be 2.5-3.5 hours depending on your skin & your artist. The final result should not be judged until 4-6 weeks after the touch up procedure.

WHAT ARE THE CONTRAINDICATIONS FOR THIS PROCEDURE?
– Those taking Rx blood thinners ( must have a physician’s note.)
– Pregnant or Nursing
– A history of keloid scarring or active eczema/psoriasis in the brow area
– Diabetic (if not using insulin, you may get a physician’s note of approval)
– Chemotherapy & Radiation ( must be at least 12 months post treatment)
– Viral Infections or Diseases such as Hepatitis B
– Epilepsy (consult with your physician)
– Pacemaker or major heart problems
– If you normally take antibiotics prior to dentist visits you must be premedicated prior to your microblading session and have a physician’s note.
– Organ transplant (consult your physician)
– Actively sick (flu/cold symptoms)
– Recent Botox or Dysport (must wait minimum of 2 weeks)
– Currently taking Accutane or any oral form of retinoid ( must wait 6 months for treatment)

HOW SHOULD I PREPARE FOR MY APPOINTMENT?

– Do not drink coffee or energy drinks on the day of treatment. Do not drink alcohol 24 hours before the day of treatment.
– Do not take Aspirin, Niacin, Vitamin E or Ibuprofen (Advil) 24 hours before treatment.
– Do not take Omega3 (fish oil) 1 week before treatment
– Do not tan or have intentional sun exposure 3 days before treatment
– No chemical peels, microdermabrasion, laser or other treatments 2 weeks before treatment.
– Do not wax, tweeze or tint brows for 7 days prior.
– Shower & fix your hair (due to the fact that you will need to avoid getting the application area wet for several days).
– If you desire/require a patch test, it must be done 24-48 hours prior to treatment. Please discuss with your artist.
– Prior Microblading/PMU not done by our artists will need to be evaluated for suitability of new service. A photograph is fine or a consultation is available free of charge

POST CARE
– After Care is an extremely important part of the healing process. The ultimate success of your procedure relies on your diligence to after care instruction.
– The tattooed area will be dark for the first several days and then will fade about 50% after the first three days into a natural shade.
–  While healing, the tattoo will look spotty. Do not be alarmed by fading after the first application. The final color cannot be judged until at least 3 weeks after the 2nd appointment. This is the reason follow-ups are required.
–  If there is any swelling immediately after the procedure, an ice pack should be applied for no more than 15 minutes at a time
– DAY 1: 30-60 minutes after treatment it is necessary to clean your brows with a ph neutral wipe or soap which will be provided in your AfterCare Kit. This removes excess pigment and lymph and prevents thick scabbing. Thick scabbing is the enemy of pigment retention so do not neglect this step. Clean gently with the wipe or fingertips. If using soap, rinse & air dry or blow dry on low. Then apply a small amount of ointment/ balm from your AfterCare Kit.
– Day 2-10: AM- Shower, avoid brows. PM- Wash brows, air or blow dry, then apply ointment. If a soap isn’t part of your kit, you can use Dial or Baby Shampoo.
– While healing do not use ANY other products around the treatment area or submerge in water ( i.e. swimming, showers )
– Avoid hot showers, saunas, steam rooms and heavy sweating.
– Do not pick, itch or touch! Light scab must remain for 5+ days to keep pigment. If brows feel uncomfortably dry or itchy apply a small amount of ointment.
– Avoid sleeping with your face pressed against your pillow. Use a fresh pillowcase the first night & change regularly. Silk or satin is ideal.
– Avoid applying makeup to the brow area for 10 days.

HOW DOES THE PROCEDURE WORK?
Before the procedure, your existing brows & skin will be analyzed. Your Artist will discuss your desired result and then using your individual bone structure and the Golden Ratio technique a new shape is carefully drawn out. Your brows will be tailored for you…no cookie cutter / stencil designs. Once approved a photo will be taken and you’re on your way to beautiful brows.
All styles of Powder Brows  are done in 2 sessions spaced 4-6 weeks apart. In the first session the shape will be set, color will be deposited and the foundation of your new brows will be built.
In the follow-up “Perfection Session” we will spot correct, adjust size if needed and finalize the perfect color. Occasionally, depending on your individual healing process, a third session may be required. Your first session will be 2.5-3.5 hours depending on your skin & your artist.

WHO IS A GOOD CANDIDATE FOR POWDER/ OMBRE BROWS?
– Powder brows are great for those who want extra definition without the hassle of filling in the brows every day.
– It’s the preferred technique for people with oily skin, as it typically lasts much longer than microblading.
– Perfect for those who like the look of brow make-up everyday

ARE THERE ANY CONTRAINDICATIONS FOR POWDER/OMBRE BROWS?
– Permanent makeup is not suited to those with a history of keloid scarring or eczema/ psoriasis in the brow area.
– Those taking Rx blood thinners (must have a physician’s note.)
– Pregnant or Nursing
– Diabetic (if not using insulin, you may get a physician’s note of approval)
– Chemotherapy & Radiation (must be 12 months post treatment)
– Viral Infections or Diseases such as Hepatitis B
– Epilepsy (consult with your physician)
– Pacemaker or major heart problems
– If you normally take antibiotics prior to dentist visits you must be premedicated prior to your Permanent Makeup session and have a physician’s note.
– Organ transplant (consult your physician)
– Actively sick (flu/cold symptoms)
– Recent Botox or Dysport (must wait minimum of 2 weeks)
– Currently on Accutane or any oral form of retinoid (must wait 6 months for treatment)

HOW SHOULD I PREPARE FOR MY APPOINTMENT?
– Do not drink coffee or energy drinks on the day of treatment. Do not drink alcohol 24 hours before the day of treatment.
– Do not take Aspirin, Niacin, Vitamin E or Ibuprofen (Advil) 24 hours before treatment.
– Do not take Omega3 (fish oil) 1 week before treatment
– Do not tan or have intentional sun exposure 3 days before treatment
– No chemical peels, microdermabrasion, laser or other treatments 2 weeks before treatment.
– Do not wax, tweeze or tint brows for 7 days prior.
– Shower & fix your hair ( due to the fact that you will need the application area wet for several days).
– If you desire/ require a patch test, it must be done 24-48 hours prior to treatment. Please discuss with your artist.
– Prior permanent makeup not done by our artists will need to be evaluated for suitability of new service. A photograph is fine or a consultation is available free of charge.

WHAT IS THE AFTERCARE PROCEDURE LIKE?
– After Care is an extremely important part of the healing process. The ultimate success of your procedure relies on your diligence to after care instruction.
– The tattooed area will be dark for the first several days and then will fade about 50% after the first three days into a natural shade.
–  While healing, the tattoo will look spotty. Do not be alarmed by fading after the first application. The final color cannot be judged until at least 3 weeks after the 2nd appointment. This is the reason follow-ups are required.
–  If there is any swelling immediately after the procedure, an ice pack should be applied for no more than 15 minutes at a time
– DAY 1: 30-60 minutes after treatment it is necessary to clean your brows with a PH-neutral wipe or soap which will be provided in your AfterCare Kit. This removes excess pigment and lymph and prevents thick scabbing. Thick scabbing is the enemy of pigment retention so do not neglect this step. Clean gently with the wipe or fingertips. If using soap, rinse & air dry or blow dry on low. Then apply a small amount of ointment/ balm from your AfterCare Kit.
– Day 2-10: AM- Shower, avoid brows. PM- Wash brows with antibacterial soap, air or blow dry, then apply ointment. If a soap isn’t part of your kit, you can use Dial or Baby Shampoo.
– While healing, do not use ANY other products around the treatment area or submerge in water (i.e. swimming, showers )
– Avoid hot showers, saunas, steam rooms and heavy sweating.
– Do not pick, itch or touch! Light scab must remain for 5+ days to keep pigment. If brows feel uncomfortably dry or itchy apply a small amount of ointment.
– Avoid sleeping with your face pressed against your pillow. Use a fresh pillowcase the first night & change regularly. Silk or satin is ideal.
– Avoid applying makeup to the brow area for 10 days.

HOW DOES THE PROCEDURE WORK?
Using cutting edge tools and techniques, high quality pigment is implanted in the area of the lashes top and bottom which enhances your eye shape and color.
The design is completed in 2 sessions spaced 6-8 weeks apart and your comfort is ensured with topical numbing agents deemed safe for the delicate eye area. The eyeliner tattoo takes a few days to fully heal and for the pigment to settle, but most people return to work the following day. Your 6-8 week touchup session will ensure long lasting pigment retention.
Before your procedure an in depth consultation will be done. Your expectations and desires will be discussed and an outline is drawn for your approval. Eye safe topical anesthetic will be applied for your comfort. As well, your eyes will be closed during the procedure, so no worries about damage to your eyes.
The entire procedure including consultation, photos, numbing, tattoo and aftercare review will take approximately 2-2.5 hours.

WHO IS EYELINER TATTOO GOOD FOR?
– Semi permanent eyeliner is particularly good for people who struggle with sensitive skin or those who cannot use standard makeup products.
– It is ideal for those who swim, play sports or do other activities that would normally cause makeup to run.
– It is also good for those with poor eyesight, unsteady hands or who have lost their eyelashes.

WHO IS NOT A GOOD CANDIDATE FOR EYELINER TATTOO?
– Under the age of 18 years
– Pregnant or nursing
– Diabetic using Insulin (will require physician’s note)
– Have an autoimmune disease (will require physician’s note)
– Using blood thinners (will require a physician’s note)
– Those with epilepsy
– Infections (localized to the area or systemic)
–  Sick (experiencing cold/flu symptoms)
– Have major heart problems
– Had an organ transplant (consult with physician)
– Have skin conditions (eczema, psoriasis) or irritations (rashes, sunburn, acne, etc.) in or near the procedure area
– Prone to keloid scars or hypertrophic scarring
– Used Accutane or other oral retinoid in the past year
– Undergoing chemotherapy or radiation (must wait 12 months)
– Have had sensitivities to dyes/pigments or local anesthetics (patch testing is available)
– Have ocular herpes, a stye or existing corneal abrasions/burns
– Eye conditions that require use of medicated eye drops
Other Considerations:
– Very hooded eyelids may limit the extent to which the eyeliner can be done
– Have lash extensions – must remove 1 week before tattooing (so not to damage the hair follicle)
– Use Latisse or lash serum – must stop serums 4 weeks before tattooing

PRE-TREATMENT
– Remove all eye makeup. If you have an ideal eyeliner design in mind, bring a few reference photos to your appointment.
– If you wear contacts they must be removed. Please bring your glasses with you.
– Do not consume alcohol, caffeine or blood thinners (Aspirin, Ibuprofen, fish oil, Niacin, Vitamin E) 24 hours before your procedure, to avoid excess bleeding, which directly affects color retention.
– Avoid sun/ tanning bed exposure for 3 days BEFORE and AFTER your procedure.
– It is recommended to plan any vacations a minimum of 14 days after the procedure.
– ​Some cosmetic procedures should be completed prior to your eyeliner tattoo:​
 – Lash extensions (must be removed 1 week before tattooing)
 – Latisse or lash serum (must stop serums 4 weeks before tattooing)
 – Lash tinting (1 week in advance)
 – Botox (2 weeks in advance)

POST CARE TREATMENT
– Avoid  swimming, hot steamy showers, direct sun, steam rooms, saunas and heavy perspiration from exercise for 7 days minimum.
– If the area does get wet, air dry or blow dry. Do not use a tissue or towel which can catch on the pigment flakes and remove them prematurely.
– Shower with your back to the water( or wear a shower shield) to avoid water, shampoo and conditioner from getting onto the eye area.
– When cleansing the face do not rub the eye area for at least 10 days. Instead use your cleanser  (baby shampoo) on a Q-Tip.
– Do not pick or scratch tattooed areas.
– Do not wear contacts immediately after eyeliner procedure.
– Do not wear makeup on the tattooed area for 10 days.
– Do not use antibiotic ointment or anything else during healing.
– Only apply the ointment that comes in your AfterCare Kit.

HOW LONG DO RESULTS LAST?
–  Many different factors affect the life of the implanted pigment, such as sun exposure, skin type, general health and immediate and long term aftercare.
–  Results can last years, but most clients will require a touch-up every 2-4 years to refresh color and shape.
–  Frequent smokers or those with iron deficiency anemia may have results fade sooner.
– Those using lash growth serums will notice their eyeliner fades faster and may migrate slightly from the original tattoo design. Please discuss long term results with your PMU Artist.
WHO IS LIP BLUSHING FOR?
– People who don’t have a naturally defined border and struggle to line their lips.
– Those who have loss of pigmentation and scarring.
– Those with dark or pigmented lips who would like to neutralize any purple, blue or ashy tones and make the lips a more uniform color. ( More lipstick look required)
HOW DOES IT WORK?
– A tiny mechanized needle deposits pigment into the lips, which builds layers of color. Results vary person to person and 2 sessions are needed for best results. Generally, lip blushing can last several years depending on how you care for the lip area and lifestyle choices.

HOW SHOULD I PREPARE FOR MY APPOINTMENT?
– Moisturize your lips with vaseline daily until your appointment day
– If you are prone to cold sores, lip tattooing can cause outbreaks. You should take an anti-viral or cold sore medication which you can get from your physician. You can also take Lysine which is available at the health food store.
– Do not drink alcohol or caffeine 24 hours prior to your procedure (these are natural blood thinners that can cause excessive bleeding during the treatment)
– Do not take Aspirin, Niacin, Vitamin E, Fish Oil or Advil/Ibuprofen 24 hours before your procedure – unless medically necessary (these are blood thinners as well)
– Do not have filler injections in the lip area 2-3 weeks before your appointment.
– No tanning 2 weeks before and after treatment, this can affect the color of the ink when healed.
– Do not workout on the day of your treatment
– Have something to eat before the procedure as it can take up to 3 hours for your first session.
– If you are not feeling well and having flu-like symptoms you will need to reschedule your appointment.

WHAT IS THE AFTERCARE PROCEDURE LIKE FOR LIP BLUSHING?
DAY 1 (Swollen lips)
– Dab the lips with damp cotton to remove lymph and blood from treatment.
– Apply (clean and covered) ice pack to your lips to reduce the swelling.
– Before bedtime, dab the lips again with damp cotton and apply the ointment.
– *When you sleep, avoid sheets or pillows to touch your lips. DAY 2 (Swollen, darker and bigger lips)
– Wash your lips gently using mild soap, don’t rub.
– Apply the ointment 2-3 times a day or more to your lips, keep it moisturized at all times.
EATING & DRINKING
– Use a straw when drinking to avoid liquids touching your lips
– Don’t eat HOT, ACIDIC & SPICY foods
– Cut your food to smaller portions to avoid touching your lips
– Always clean your lips and mouth after eating to avoid infection
OTHER ACTIVITIES
– NO kissing
– NO smoking or vaping
– NO sunbathing, sunbed, steam, saunas

DAY 3-4 (Start to peel)
– Wash your lips gently using mild soap, don’t rub.
– Apply the ointment 2-3 times a day or more to your lips, keep it moisturized all the time.
– Don’t pick and rub the skin.
DAY 5-7 (Peeling has stopped, lips are looking pale)
– Wash your lips gently using mild soap, don’t rub.
– Apply the ointment 2-3 times a day or more to your lips, keep it moisturized all the time.
– Don’t pick and rub the skin.
WEEK 2-4
(60% of Lip color is coming back, could be patchy) Note: Darker lips could take time to heal and might take 8 weeks to see the result.
WEEK 6-8 – READY FOR TOUCH UP

Have Questions? Contact Us Now!