Have Questions? Contact Us Now!
Lip Blushing
15 October, 2025
- By whitebunniegpa
Tips for Lip Blushing on Fair, Medium & Deep Skin Tones
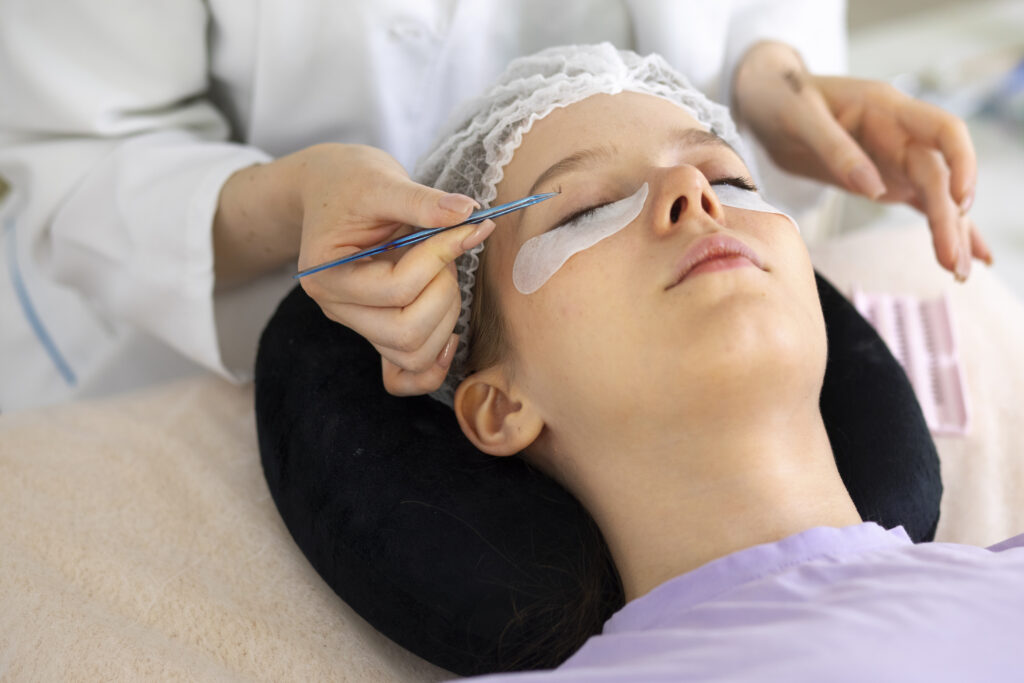
Lip blushing offers a simple promise: wake up with perfectly tinted, defined lips. It’s a subtle enhancement that can boost your confidence and cut down your morning routine. But lip blushing is not a one-size-fits-all service. The key to a beautiful, natural result lies in understanding how to work with an individual’s unique skin tone.
As trainers at MN Brow Lash Academy here in Minnesota, we teach our artists that skin tone is the most important factor in their work. A color that looks great on fair skin might disappear on deeper skin. Here is our guide to approaching lip blushing for the full spectrum of skin tones.
The Golden Rule: It’s All About Undertones
Before we even talk about fair or deep skin, we have to talk about undertones. The pigment your artist chooses is only one part of the equation. The final, healed color is a mix of that pigment and the natural color already in your lips.
Your lips have their own unique base color, which can have cool (blue, pink, purple) or warm (yellow, peach, golden) undertones. A skilled artist must analyze these undertones to select a pigment that will heal into the perfect shade. Ignoring this step is the biggest mistake an artist can make.
Lip Blushing on Fair Skin Tones
People with fair skin often have lips with naturally cool, pinkish undertones. Their skin is also more transparent, meaning pigment can show up very vividly.
Color and Technique Tips
- The Goal: The aim is to create a soft, healthy blush of color that looks like a natural flush. Think “just-bitten” rather than “lipstick.”
- Best Pigment Choices: Soft pinks, peachy nudes, and light corals are excellent choices. These colors add life without overpowering fair features. We advise against very dark or cool-toned pigments, as they can look harsh once healed.
- Technique Matters: An artist should use a light hand. It’s always better to be conservative and build the color over two sessions than to implant too much pigment at once. For fair skin, less is almost always more.
A Real-World Example
A client with pale skin and light pink lips wanted a subtle boost. She just wanted to avoid looking washed out without makeup. Her artist chose a soft, peachy-pink pigment. The result was a delicate wash of color that warmed up her entire face. It looked like her natural lips, but better.
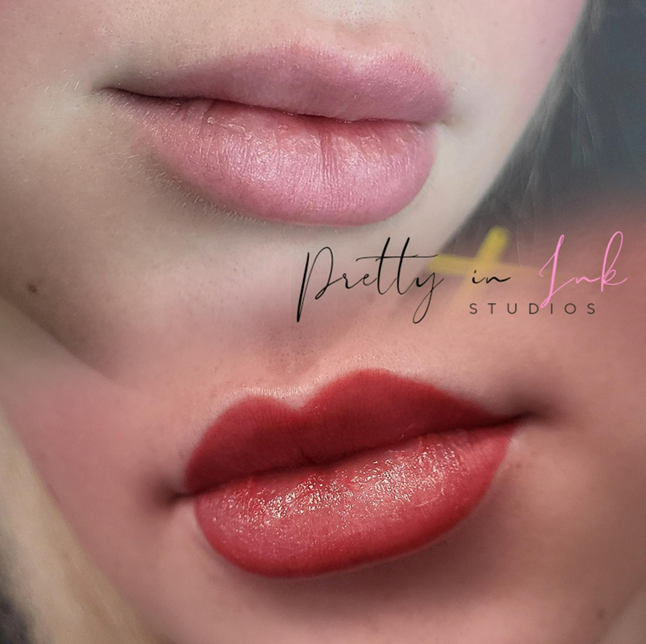
Lip Blushing on Medium Skin Tones
Medium skin tones, including olive and tanned skin, offer a lot of versatility. The natural lip color is often more pigmented, sometimes with a mix of warm and cool tones.
Color and Technique Tips
- The Goal: To enhance definition, even out the lip color, and add a touch of warmth or richness.
- Best Pigment Choices: This group can handle more color. Warm corals, dusty roses, mauves, and terracotta shades heal beautifully.
- Neutralizing is Sometimes Needed: If the natural lips have a brownish or purplish tint, the artist may need to neutralize them first. This involves using a warm-based pigment, like a soft orange, to cancel out the cool tones before applying the target color. This ensures the final shade heals true.
A Real-World Example
A client with olive skin felt her lips looked a little dull. Her artist saw that her natural lips had a slight brownish undertone. In the first session, the artist used a warm-based pigment to neutralize this base. At the touch-up appointment, she layered a beautiful dusty rose on top. The healed result was a perfect, warm pink that complemented her skin wonderfully.
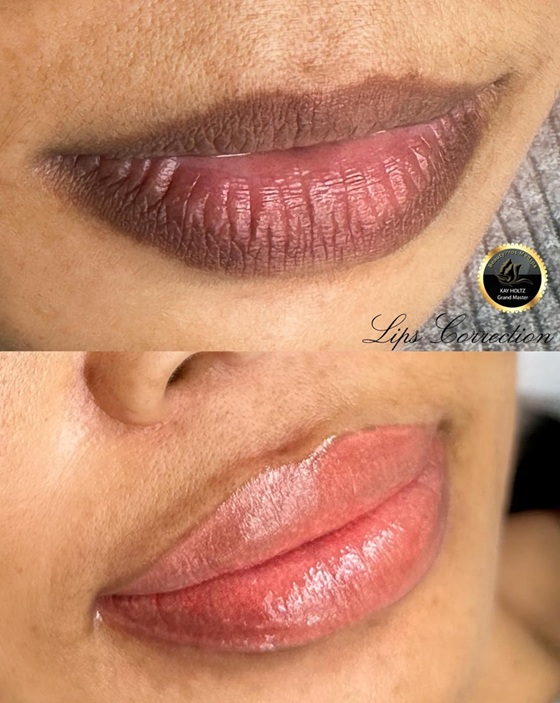
Lip Blushing on Deep Skin Tones
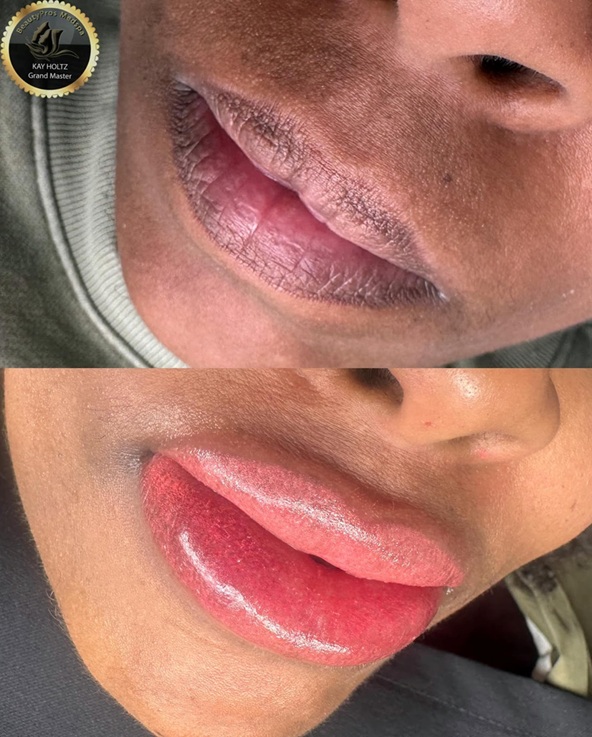
Working with deep skin tones is an advanced skill that requires a deep understanding of color theory. Melanin-rich skin often means the lips have strong cool undertones, sometimes appearing blue, purple, or having a dark border.
Color and Technique Tips
- The Goal: The primary goal is often to neutralize the cool tones and introduce warmth. This creates an even, healthy-looking lip color. The intent is not to drastically lighten the lips, but to give them a vibrant, warm blush.
- Neutralization is Essential: This is the most critical step. An artist must use a vibrant, warm pigment (like a bright orange or warm red) as a foundational layer. This cancels out the blue and purple tones in the lips. Skipping this step can cause the lips to heal even darker or grayer.
- Target Color Choices: Once the lips are neutralized, rich berry colors, deep corals, and warm reddish-browns can be applied. These colors create a gorgeous, rich tint against deep skin.
- It’s a Process: Achieving the final look on deep skin tones almost always requires at least two sessions. The first appointment is often dedicated entirely to neutralization. The client must be patient and trust the process.
A Real-World Example
A client came to us with two-toned lips—a dark purple border with a lighter center. She wanted a more uniform, warm color. The artist spent the entire first session implanting a bright orange pigment across both lips to neutralize the deep purple. The client left with very bright lips, which is normal. Weeks later, they healed to a neutral, warm brown. At her second appointment, the artist applied a rich berry pigment, resulting in a beautiful, even tone across her entire mouth.
Your Artist Makes the Difference
Lip blushing is a beautiful service that can work for everyone when done correctly. The key is choosing an artist who doesn’t just know how to use the machine, but who truly understands color theory and how to customize their approach for every client.
At MN Brow Lash Academy, we teach our students that artistry is about more than technique; it’s about knowledge and careful planning. Ask your artist about their experience with your skin tone. A confident, knowledgeable artist will be happy to explain their process.